
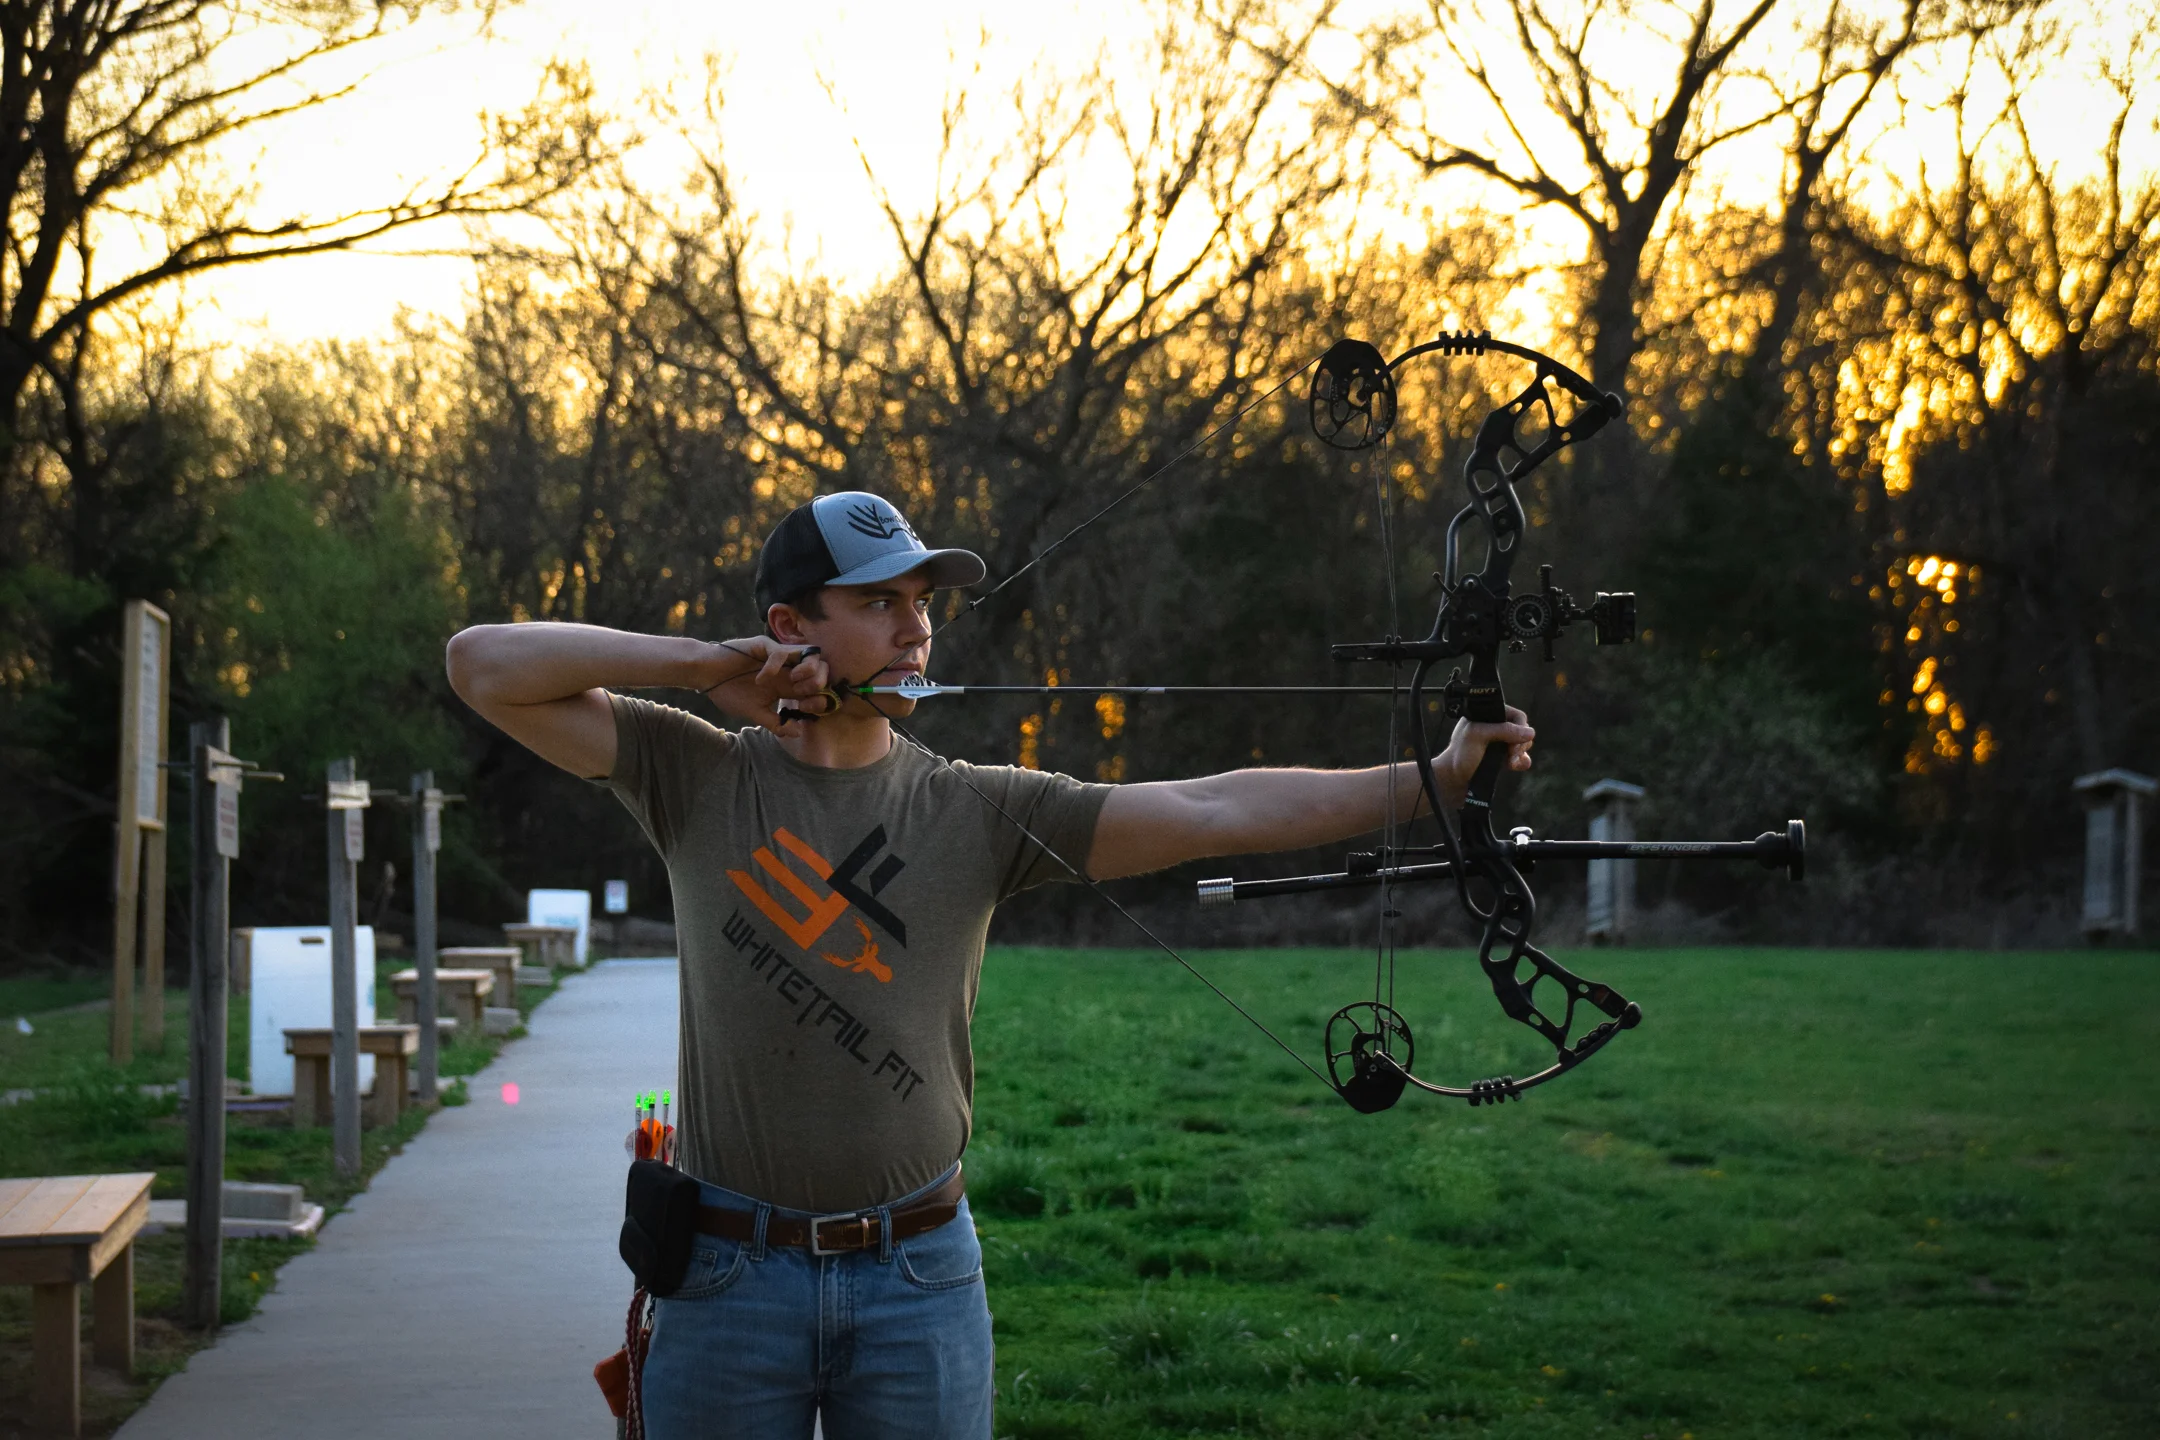
Learn how to shoot a bow
Josh Pflasterer goes over the very basics of how a beginner can learn how to shoot a compound bow with a wrist strap release.
Advanced Techniques
I share a piece of information about aiming that has made one of the biggest impacts on my shooting, as well as helped hundreds of others too.
Josh Pflasterer goes over the basics of proper archery stance.
How to cure target panic for good, and taking your shooting to the next level!!!
Josh Pflasterer explains the fundamentals of form for a proper bow grip and grip placement within your bow hand.
This video shows you how to properly set up and shoot a wrist strap release with back tension!
Josh Pflasterer explains a quick and simple way to get your rough draw length, and what to look for to find your true correct draw length.
This video shows you how to properly set up and shoot a hand held thumb release with back tension!
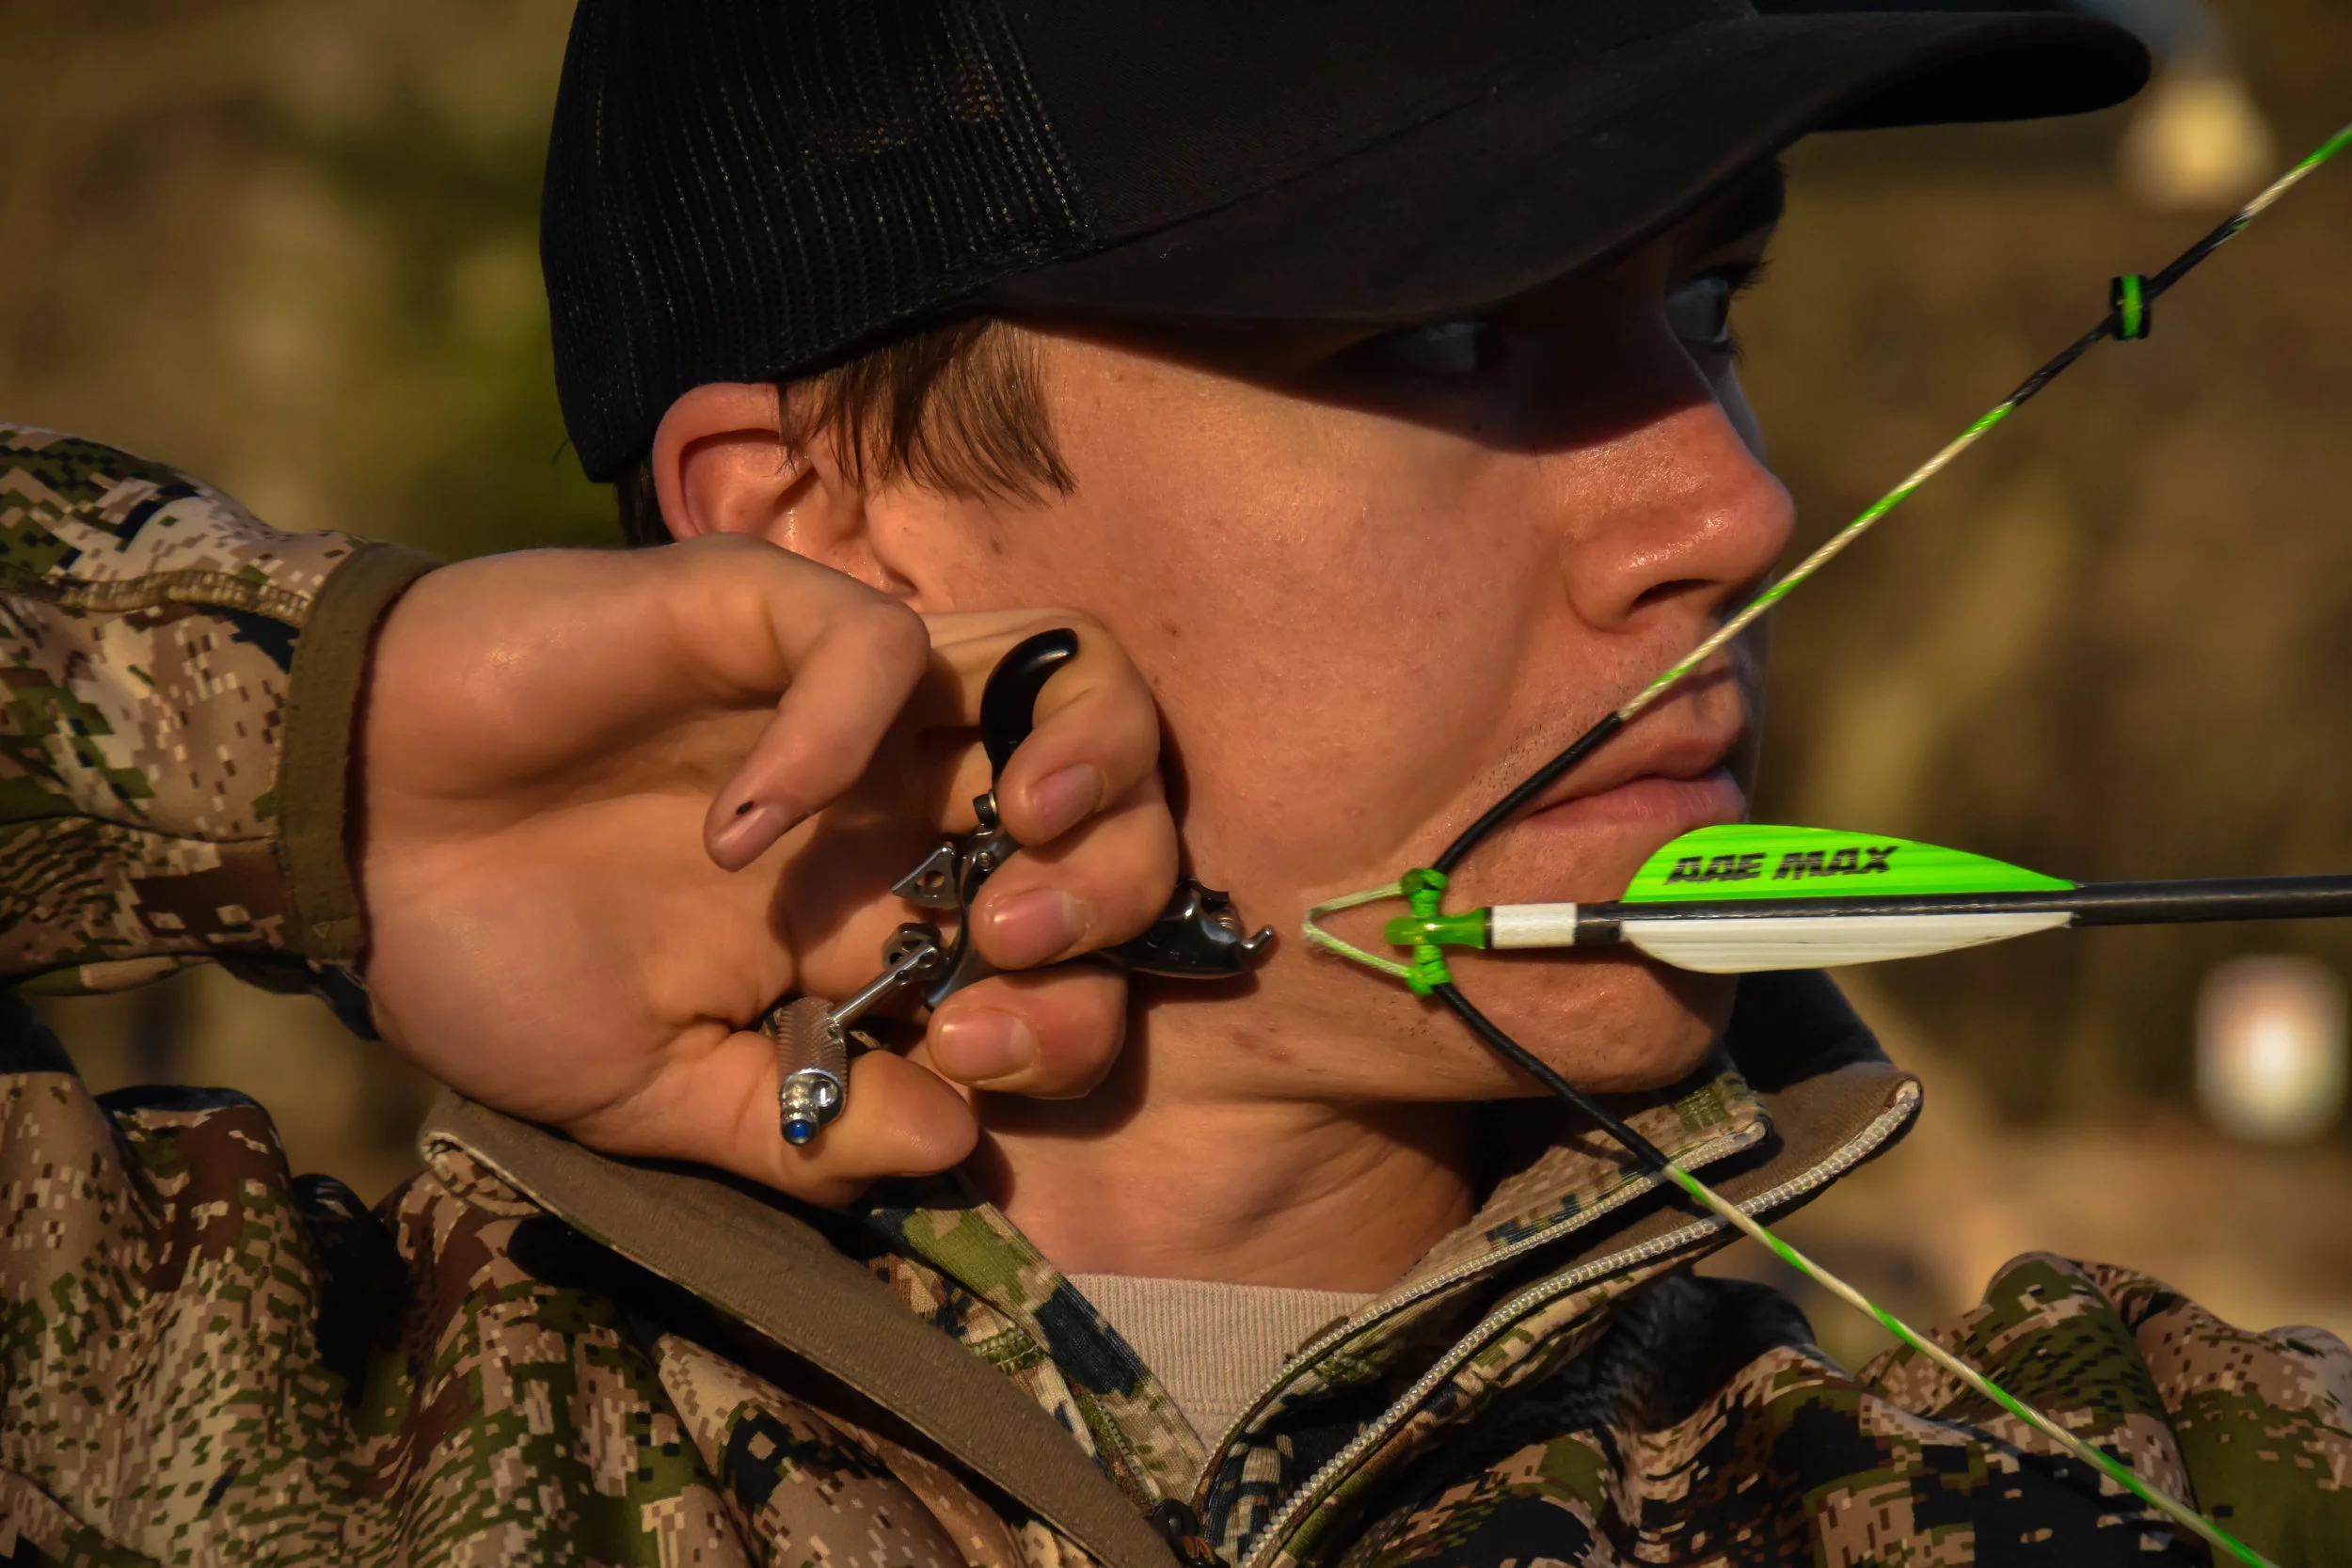
Josh Pflasterer goes into detail on how to properly anchor to get a consistent and repeatable anchor point using a wrist strap release aid.
This video shows you one of the easiest, most consistent ways to shoot a hinge release with back tension!
Josh Pflasterer goes over how to anchor with a hand held release aid for a thumb button, a hinge release, and resistance release.
Josh Pflasterer shows the best way to set the tension on a resistance release so that it fires during the steadiest part of your hold.
Set Up Your Own Bow!
Learn how to set up YOUR bow RIGHT!
The Ultimate Bow Build Masterclass Online Course
New 2022 Hoyt Carbon RX-7 Bow Build!
Paper Tuning
Low Tear (Nock Low) - If cams are synced, lower the rest, or raise the nocking point on the string. If your arrow is severely pointed downhill at rest, you may have to lower both your nocking point AND rest and start again. Just as long as you are not getting any fletching contact on the rest or riser.
High Tear (Nock High) - if the cams are synced, raise your rest or lower your nocking point. If the tear is severe, ensure your cams are synced and that you’re not getting any fletching contact. Double check that your drop away arrow rest is dropping properly and that the fletchings are not coming into contact with the launcher. If your arrow is pointing uphill, or your nocking point is below 90 degrees, you may have to raise both the nocking point AND the rest and start again.
Left Tear (Tail Left) - move rest to the right, but ensure you are not getting any fletching contact off of the riser, and that you can see your entire sight housing when aiming. Remain in the centershot measurement within your bow manufactures recommendation. If your bow has shims, move the top cam first to the LEFT. If that doesn’t fix it, move the bottom cam also to the LEFT. You may need to get different sized spacers to shift the cams accordingly. If your bow has yokes, tighten the left yoke, and loosen the right yoke as evenly as you can. You may also have to do this to the bottom cam if possible. Although it does affect it, if you are shooting a compound bow with a release, this is most likely NOT a spine issue.
Right Tear (Tail Right) - move rest to the left, but ensure you are not getting any fletching contact off the riser if you are a left handed shooter. Remain in the centershot measurement within your bow manufactures recommendation. If your bow has shims, move the top cam first to the RIGHT. If that doesn’t fix it, move the bottom cam also to the RIGHT. You may need to get different sized spacers to shift the cams accordingly. If your bow has yokes, tighten the RIGHT yoke, and loosen the LEFT yoke as evenly as you can. Although it does affect it, if you are shooting a compound bow with a release, this is most likely NOT a spine issue.
Note that if you are getting inconsistent tears, or your adjustments made to your bow and rests don’t appear to fix the tears, this is most typically a torquing problem caused by incorrect pressure on the grip. Ensure your grip is consistent and perfect to get the most out of your paper tuning and to help eliminate frustration with this process.
All About Arrows
Arrow brands and setups, which do you prefer? Micah and Josh both shoot Easton, however, there are numerous other great arrow manufacutres available. Regardless of arrow brand, the most important thing in choosing an arrow is picking the correct arrow spine. Arrow spine is the measurement of how stiff an arrow is. A person shooting a LONGER arrow with a HEAVIER weight with more weight upfront on the arrow will need a very STIFF arrow. (.300 spine for example) While a person shooting a SHORTER arrow with LOWER poundage and LIGHTER tip weight will need a much WEAKER arrow to get it to tune (.500 spine for example). It’s important to look over the arrow tune charts off your arrow manufacturer's website to determine what arrow spine you need. Adding weight up front to increase FOC will make your arrows react more than if you had a standard insert and 100 grain tip, so take that into consideration if you plan on adding weight upfront or using a heavier brass insert.
Micah is running his bow at 72bs with a 29” draw. His arrows are the Easton Axis 5mm .340 spine cut to 27” with 50 extra grains up front for a total front weight of 151.2 grains. He is also running a 4.5” wrap on the back with 3 fletch right helical AAE Max Stealth vanes. Total arrow weight is right at 456 grains. With this setup, he is shooting roughly 295 fps. For his particular set up, this arrow combo is the perfect spine, length, and weight to use as an all-around hunting arrow.
Josh is shooting his bow at 74lbs with a 28.5” draw. His arrows for the last 8 years have been the Easton Axis. He has his .340 spine shafts cut to 27” with the 50 grain brass insert up front and 100 grain field point to get right at 150 up front. He runs a light strip of reflective wrap on the back end of his arrow beneath the fletchings for added visibility. After lengthy testing, he has decided to go with the 3 fletch AAE Max Stealth vanes with a slight offset over the four fletch for reasons that will be discussed in upcoming posts. Total arrow weight is right around 463 grains. With this set up, the bow is shooting roughly 288 fps.
3 vs. 4 fletch and why I decided I to go with the 3 fletch over the 4 again this year. I run the AAE Max Stealth vanes and have for the past few years. I fletch them with a straight clamp off of a Bitzenburger jig with a slight offset. What I have began to find out is that the four fletch stabilize much quicker than the 3 fletch arrows, therefore shooting under 60 yards, the groups are fantastic! The three fletch are very comparable at these distances, but where it really shows is past the 60 yard mark. Past 60 yards, the 4 fletch puts too much “drag” on my arrows and begins to slow them down much faster than my 3 fletch. Arrow drag causes the arrow to stabilize quickly! Which is great for shorter ranges, but at longer ranges, arrow drag really begins to open up my groups. At distances of 80, 90, and 100 yards, my 3 fletch continue to out perform my 4 fletch on both windy and calm days. The 4 fletch is a fantastic option to steer fixed blade broadheads with shots mostly under 40 yards, which is what I will be shooting for hunting anyway, but regardless of that, I love the long range accuracy that the 3 fletch provides for target shooting, and it still steers my broadhead-tipped arrows excellent. Everyone's set up is different, and the only way you can determine what is best for yours is by testing. With that said, If you are not going to shoot over 40 yards for target or for hunting, a four fletch with helical is a fantastic option to steer a fixed blade broadhead more accurately.
Why Helical? Offset? Straight fletch? Left or Right wing helical, and how you choose! No, this won't make a huge difference in your shooting, but we have such a deep passion for archery and bowhunting that we want to help you become the absolute best and most ethical hunter that you can be! That includes the little things like fletchings. Helical is referred to as the angle of the fletching relative to the arrow. In this photo, this arrow has a light 2 degree offset to the RIGHT. This causes the arrow to spin slightly clockwise out of the bow, similar to how a football is thrown from a right handed quarterback. Because the arrow is spinning, it stabilizes much quicker. So, the more helical the better, right? Because the faster the arrow spins, the faster it will stabilize right? That is indeed correct, but too much helical can be a bad thing. Depending upon your setup, if you have too much helical, at further distances you will notice your arrow groups to open up slightly because of the drag that is induced from the helical. At shorter ranges you won't see it because it doesn't have as long of a time to slow the arrow down, but once you get out past 40, 50 or 60 yards you could notice a difference. Straight fletch steers your arrow just fine, but it does not give the arrow enough spin to stabilize bigger fixed blade broadheads in my experience. They will still shoot and perform fine, but with an offset or a helical, the results are much better and you will notice tighter groups with your broadheads. Both Micah and Josh shoot a slight offset on our arrows. A slight offset gets our arrows spinning, but does not induce enough drag to slow our arrows down. You have to decide what the best fletching combo for your setup will be and test it!
Tuning Toward Success
Here is how you can check to see if your arrows are fine tuned to fit your bow to be as FORGIVING and as ACCURATE as possible. These arrows are the same spine and set up, so the only change we are doing is actually to the draw weight of the bow. This changes the reaction our arrow has from our bow and either tightens our groups, or makes the arrow group open up, and fly less forgiving. The first thing you need to do is shoot a group of arrows at the furthest comfortable range you can shoot. It’s important to rule out any bad shots or fliers that you have to get an accurate reading of what is happening because of the spine of your arrow, not because of your personal form and accuracy. Either RAISE or LOWER your poundage by at least 3lbs to see a difference in group sizes. Where your arrows hit is irrelevant and not important. We are focused on group size, not accuracy. If your arrow groups tighten up or get smaller with your weight turned UP by at least 3 lbs, that means your arrows are too stiff with the draw weight you desire and you need to either increase weight in the front of your arrow, shoot a longer arrow, or increase your draw weight. These will all make the arrow weaker and react more forgiving for your set up. The exact OPPOSITE would be true if your arrow groups tightened up when you turn your poundage DOWN by at least 3 lbs. If you test both 3 lbs turned up in draw weight and 3 lbs turned down and the groups both open up more than your current set up, you have the perfect arrow spine set up for your bow. This is over the top for most archers and bowhunters, but it is a great way to fine tune your hunting and target bows to get optimum performance and forgiveness out of your shooting.
"How did you learn to work on your bows?" "What equipment is needed?" What training did you take to learn how to tune a bow?" These are some of the most asked questions I get, especially since I work as a part-time bow technician at Scheels in Lincoln, Nebraska. I have learned from experience, trial, and error based off of what I had read and what I was told ever since I was 12 years old. I had an old Diamond Razor Edge bow that I was constantly adjusting cable twists on and tuning trying to get the best arrow flight possible. Trial and error is how I learned, but there is a better way. What is needed? - a bow press and a set of allen wrenches is all you really need. A draw board is convenient to have as well, but as a kid, I couldn't afford any of the fancy bow presses you see in most archery and pro shops. $400 for a low-end bow press was not something I wanted to invest my money in regardless of age. What I ended up doing was getting a Bowmaster portable cable bow press for $50 that I could use to press my bow to twist my string and cables. No, it's not the most convenient press, and you may have to buy the limb adapters for a split limb bow, but you can do all of the adjustments and tuning with this $50 bow press as you can with a $400 solid structure bow press. No, this is not an advertisement for the Bowmaster portable bow press, I'm just showing you how you too can work on your own bows without breaking the bank.